This tutorial will guide you how to install SitePad with just few clicks using Softaculous.
Login to your control panel
Go to your control panel (e.g. cPanel, Directadmin, etc) login page and enter the correct login details.
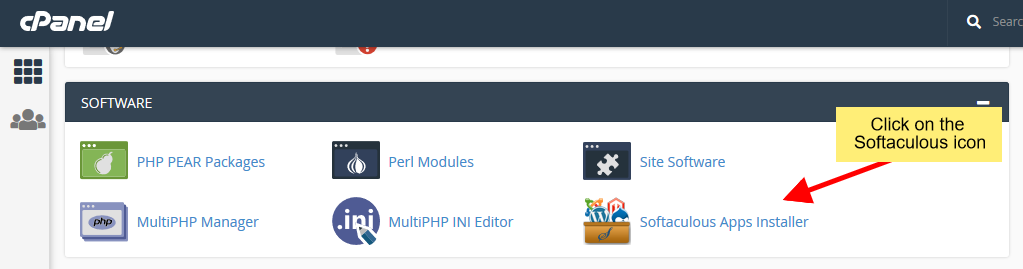
Now look for Softaculous icon in the control panel as shown in the screenshot below. Click on the Softaculous icon which will take you to the Softaculous enduser panel.
Select SitePad
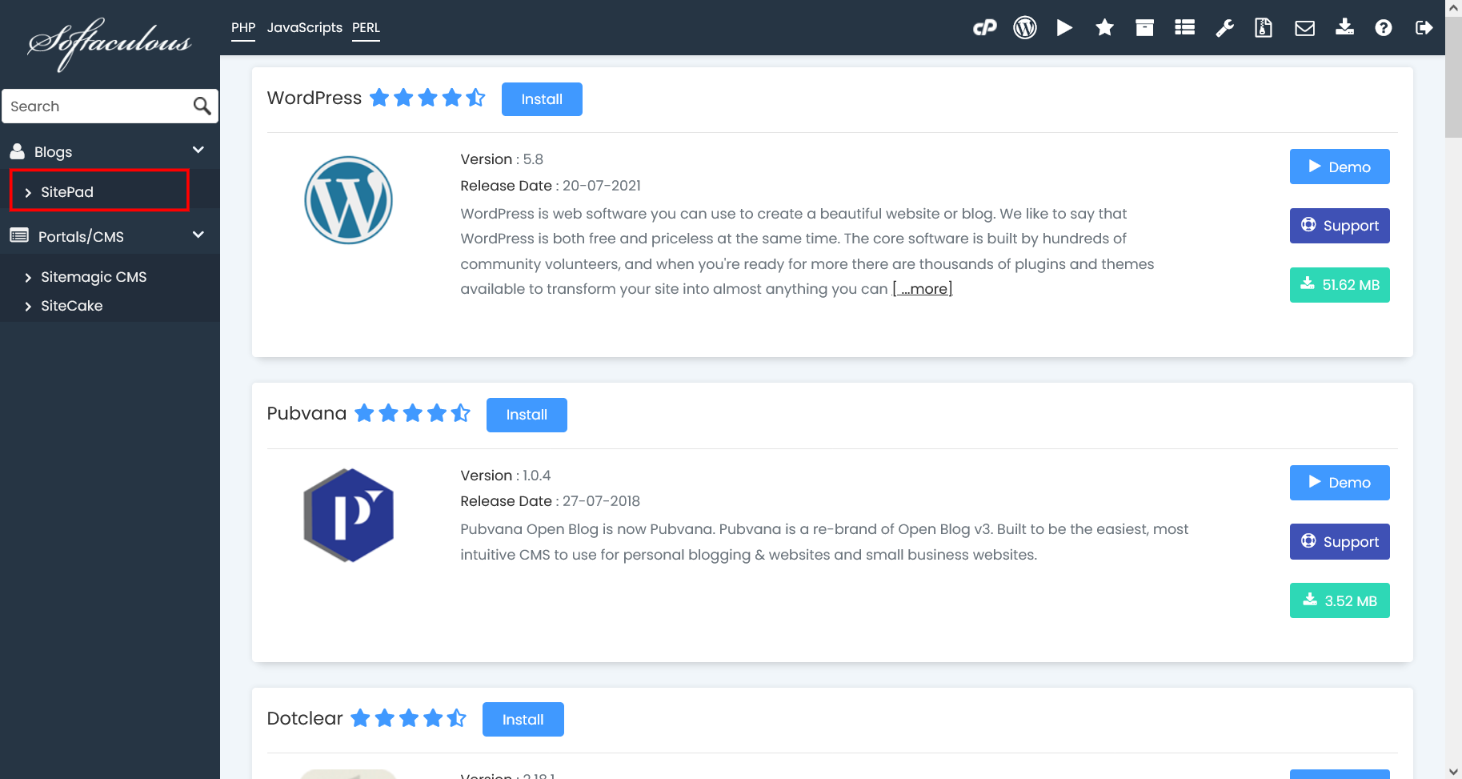
Once you are on the Softaculous enduser panel, you will need to search for SitePad as shown in the screenshot below.
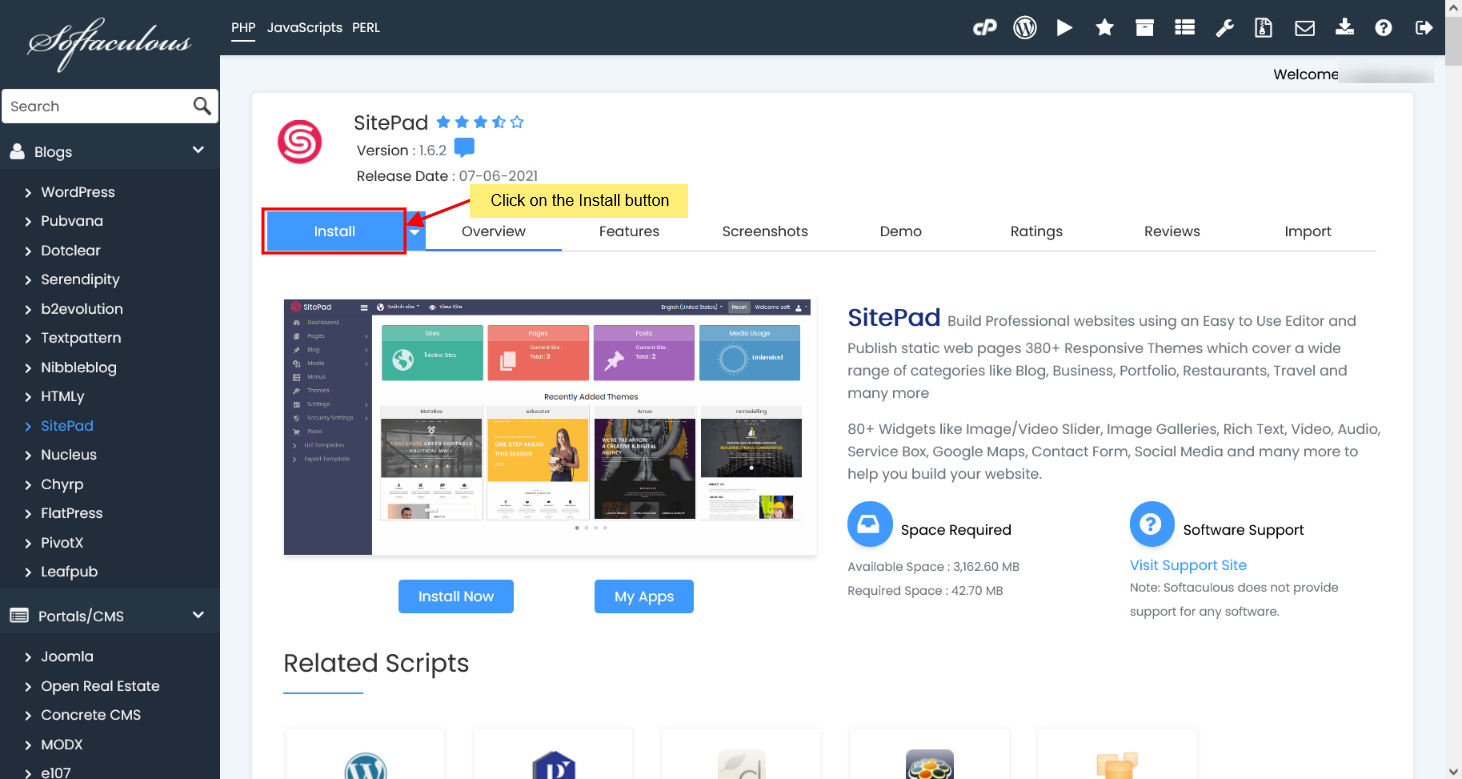
This will take you to the SitePad page, click on the Install button here which will display the install form.
Fill the install form
After clicking on the Install button, you need to fill in the form displayed as shown in the screenshot below. The form asks lots of details (which are prefilled by default), you can change it if you need or leave it as it is and proceed with the installation with default values.
Choose Installation URL : Choose the domain and the folder where you want to install SitePad.
Note : If you want to install SitePad in document root i.e. example.com and NOT in a sub directory i.e. example.com/wp then leave the In Directory field as blank.
Site Name : Choose the site name to be used for your site
Site Description : Choose the site description to be used for your site
Admin Email : Choose the email to be used for SitePad admin account
Select Language : Select the language in which you want to install SitePad
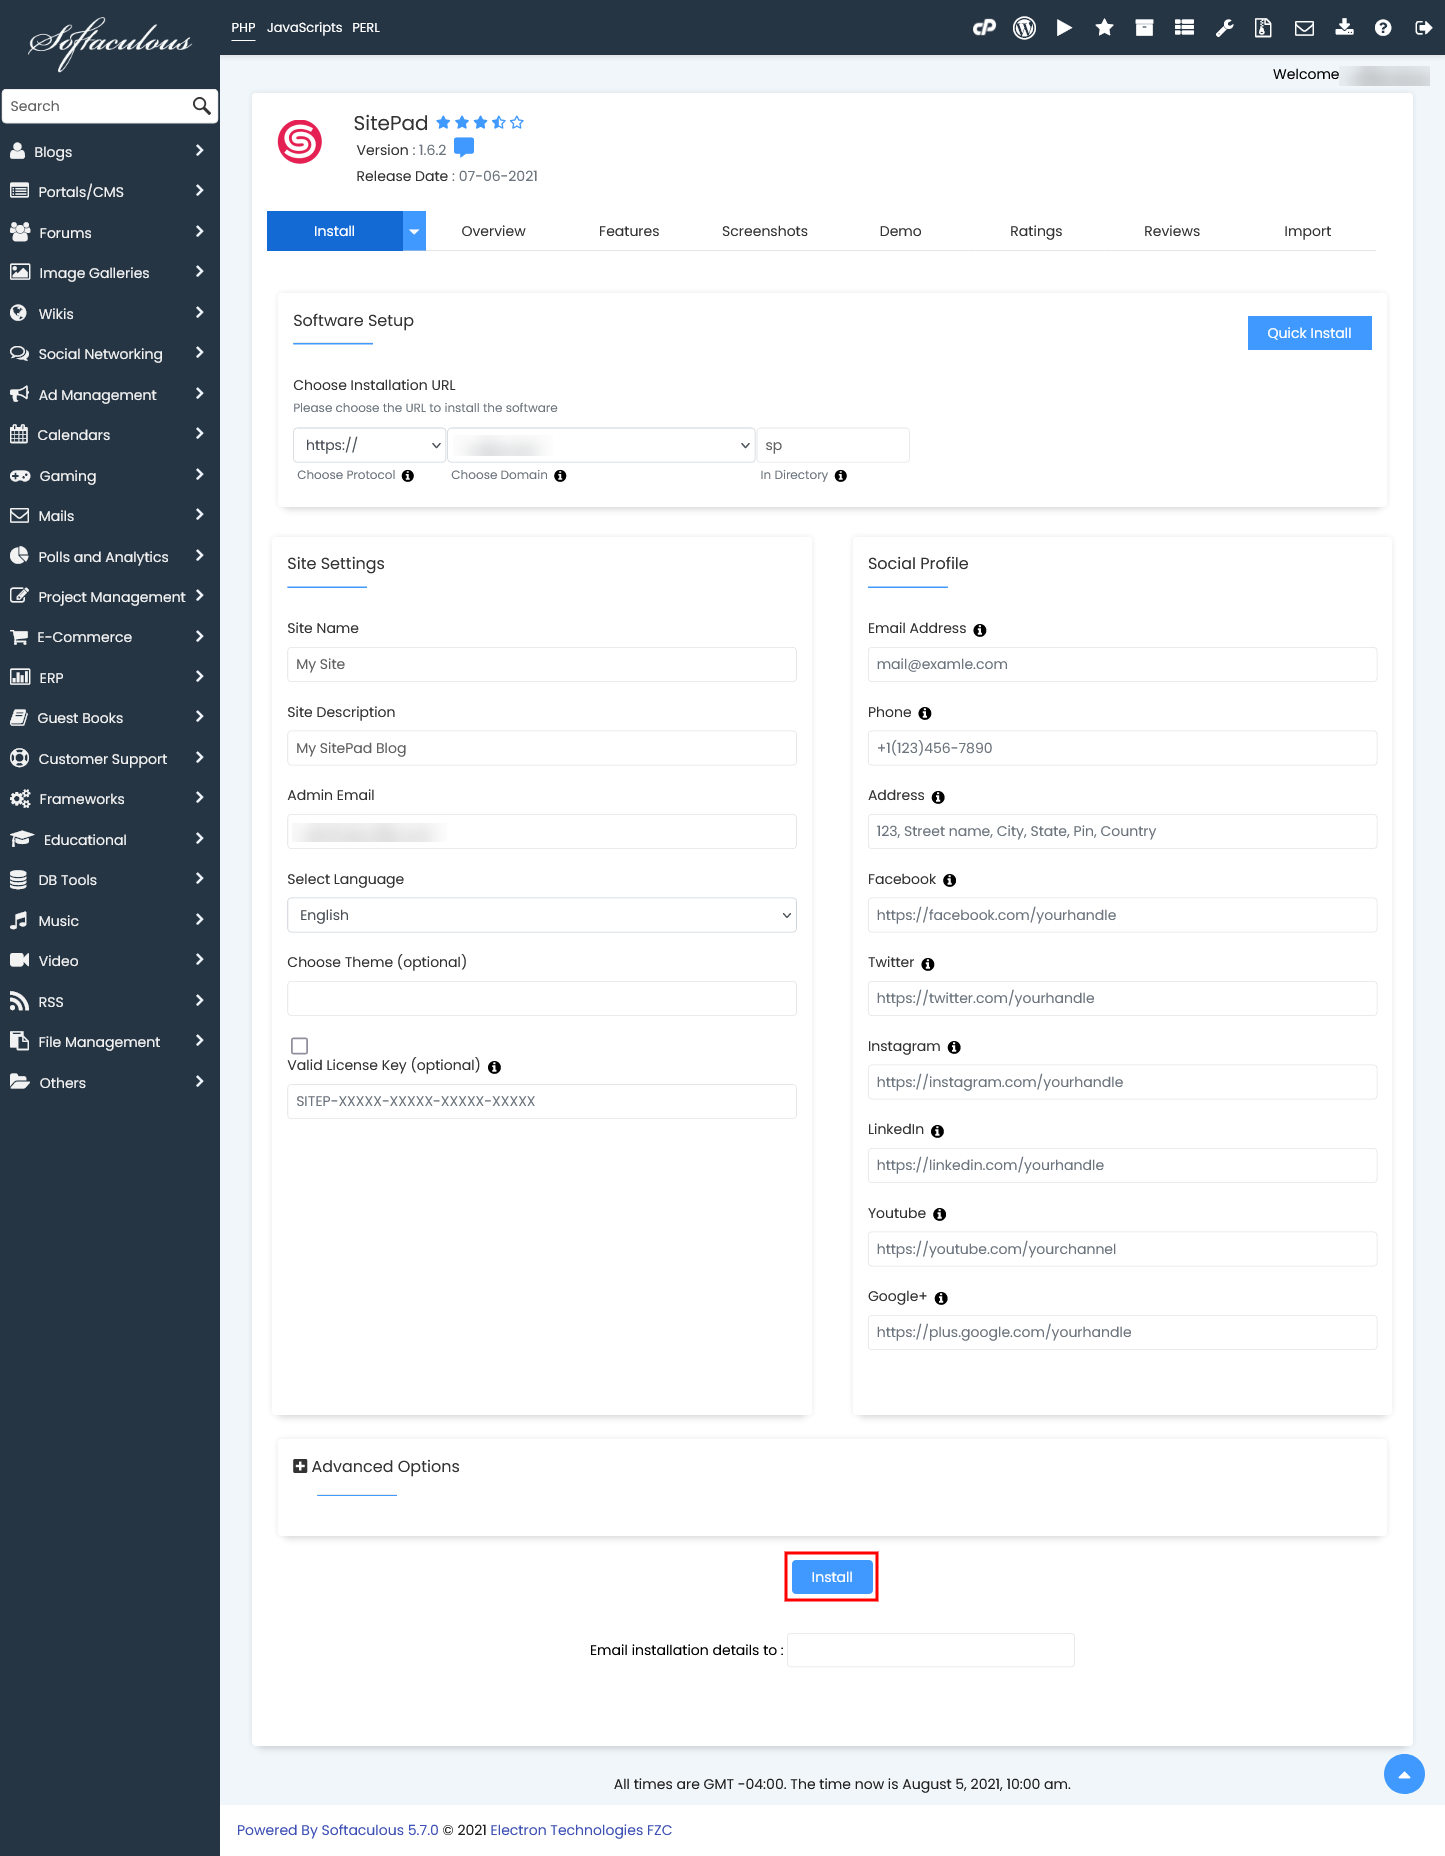
After filling the form click on the Install button to start the installation process.
Sit back and relax, let Softaculous handle the installation process for you.
Installation Completed
You will see the success message as shown in the screenshot below when the installation is completed.
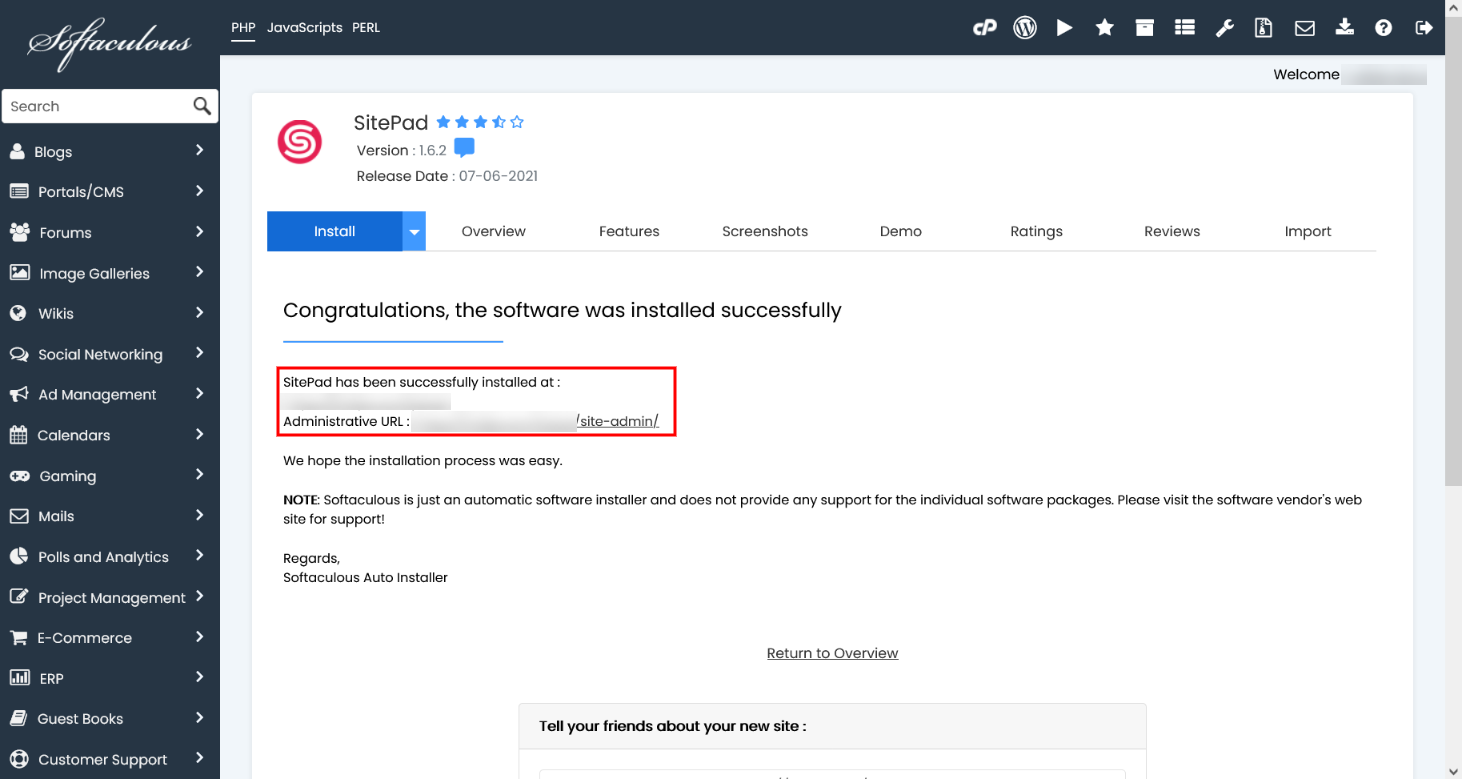
You can then access the SitePad admin panel and/or SitePad site.
We hope the installation process was easy.
You can not only install SitePad using Softaculous but you can also manage the complete life cycle of your SitePad installation which includes upgrading, backup, restore, clone, staging and much more.
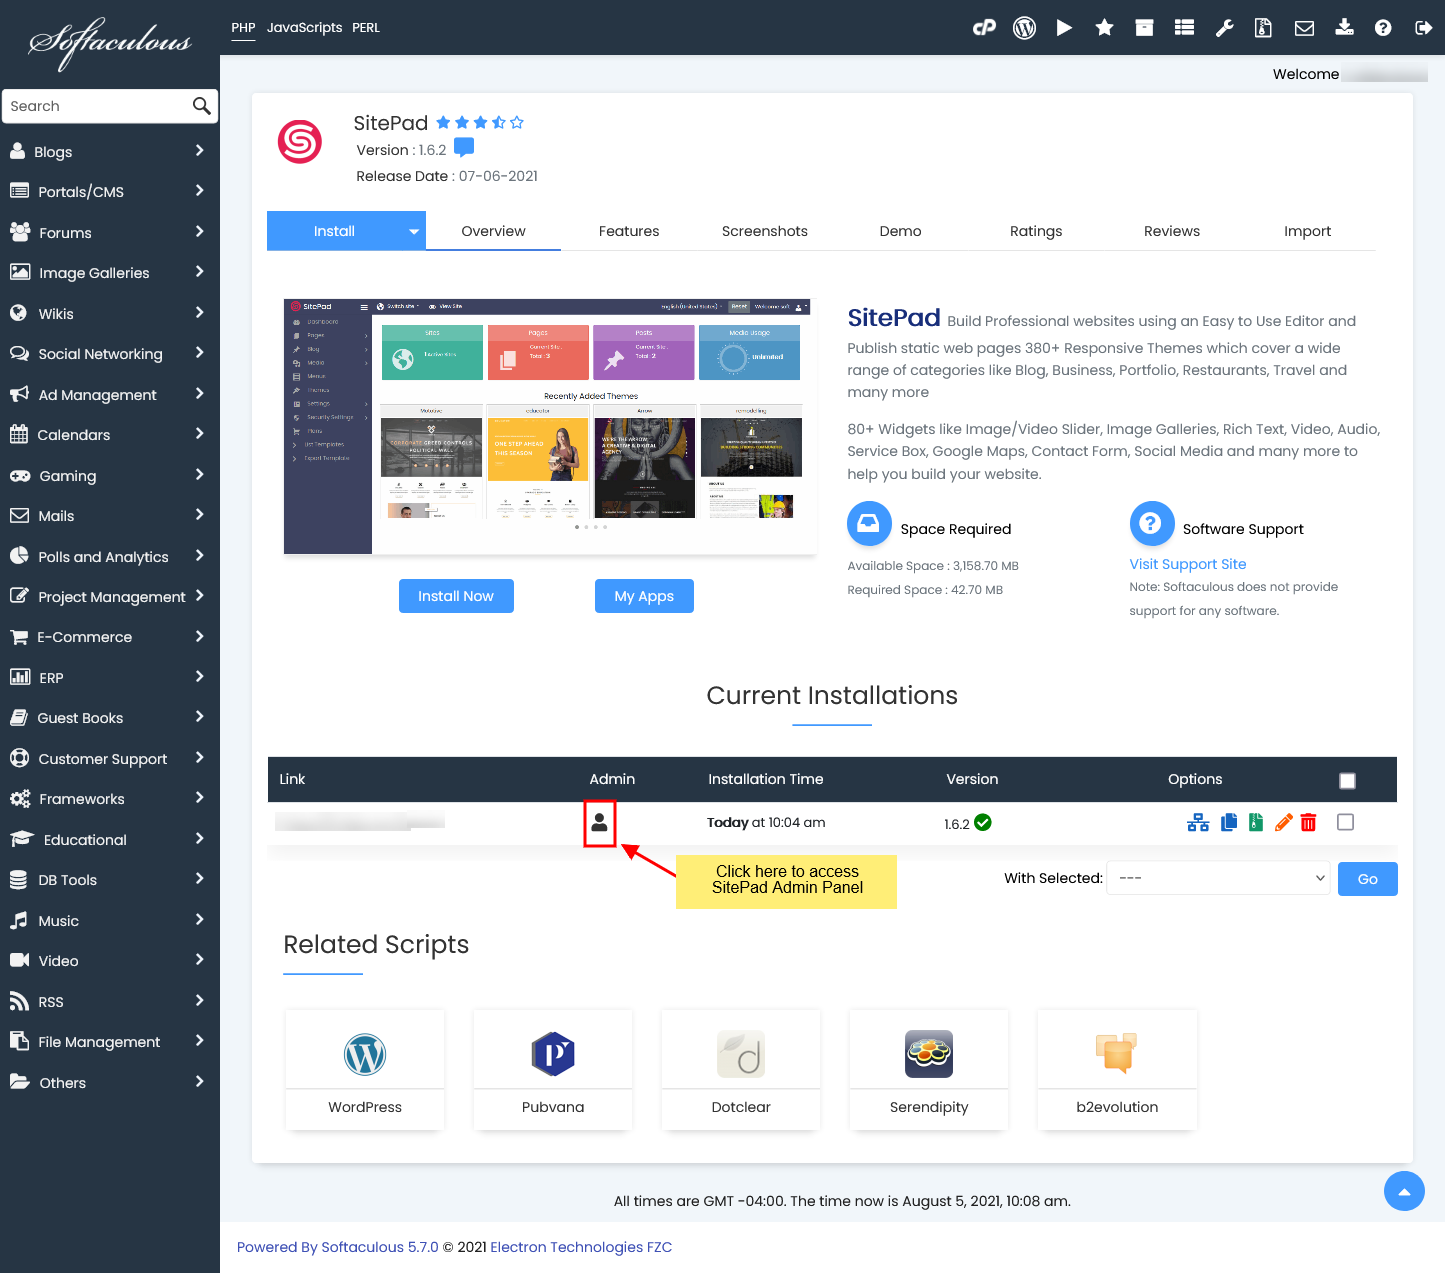
Login to SitePad Admin Panel
In order to login to the admin panel of your SitePad installation to edit your site go to Softaculous enduser panel -> SitePad page and then click on the “Admin” icon as shown in the screenshot below.