
Overview
This guide will explain how to install WordPress using Softaculous Cloud on a VM or Cloud server.
Note : This should be a Fresh VM without any data on the server. No control panel, no MySQL, no Apache, etc.
Just a new VM with OS installed. Supported OS AlmaLinux, Ubuntu, Rockylinux, CentOS, RHEL.
Softaculous Cloud will install Webuzo control panel, Apache, PHP, MySQL, SSL Certificate and WordPress on your VM. All the details will be emailed to you once the process is completed.
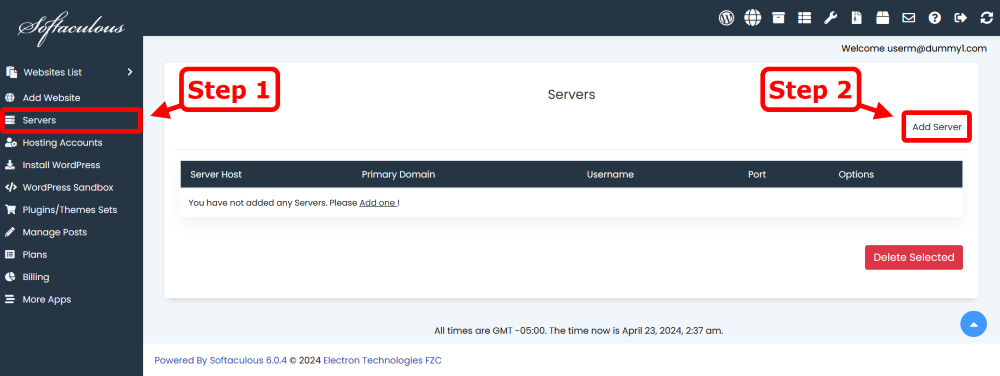
Go to Servers page
Select Servers link from the left menu to visit the Servers page which lists all existing servers you have added in your Softaculous Cloud account.
In order to add a new one click on the Add Server button.
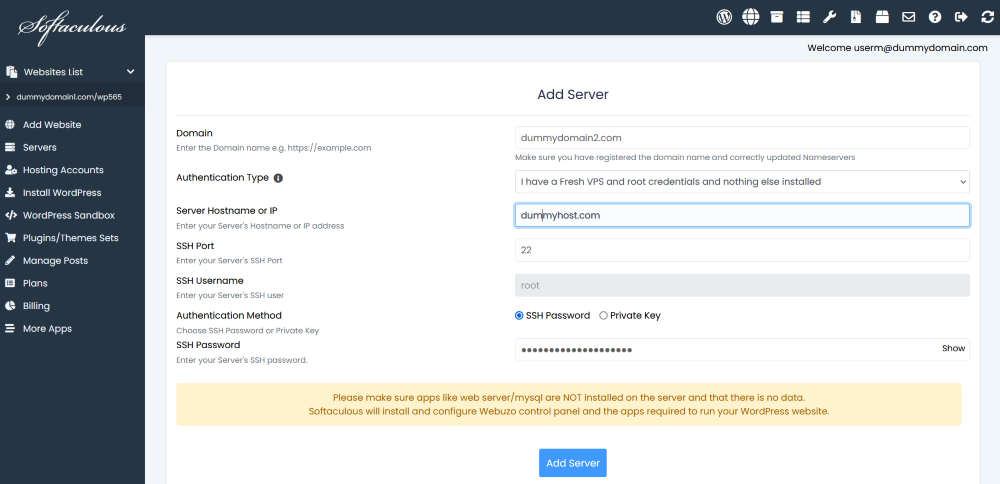
Add Server
To add a server in Softaculous Cloud, you have to provide the domain name, select the authentication type and enter the server login credentials.
- Domain : Your domain name which you would like to use WordPress on
- Authentication Type : Choose I have a Fresh VPS and root credentials and nothing else installed
- Server Hostname or IP : Your server’s hostname or IP address
- SSH Port : SSH Port
- SSH Username : root
- Authentication Method : Choose if you want to authenticate with Password or Private Key
- SSH Password or Private Key : Based on your previous choice enter SSH Password or Private Key
Submit the form and Softaculous will start the process in background. You will receive an email with the link to track progress of the server setup process. It can take few minutes to complete the process.
Once the process is complete you will receive another email with the WordPress installation link and credentials. You will also receive a separate email with the login credentials for your control panel so you can manage PHP versions and other configuration.
You can now manage your WordPress installation from the WordPress Manager section in Softaculous Cloud panel.